
The three settings
Auto-approve — the agent just does it
Auto-approve — the agent just does it
The agent runs the action without asking. Best for read-only work where you’re happy for the agent to move on its own: looking up a user’s profile, listing group memberships, reading a ticket, checking a device’s alerts.
Needs approval — a technician signs off first
Needs approval — a technician signs off first
The agent stops, writes up exactly what it wants to do, and waits for a technician to approve or deny. The approval request lands on whichever channel the ticket is on: a PSA ticket note, a Slack DM, a Teams message. Best for anything that changes state, like resetting a password, adding a user to a group, rebooting a device, sending a customer-visible reply.
Disabled — the agent can't use it at all
Disabled — the agent can't use it at all
The action is hidden from the agent. Best for actions you never want the agent to use, such as deleting a user or account.
Where to set them
Approval settings live on each integration’s detail page. Go to Settings → Integrations and click into a connected integration. Every action that integration exposes has a dropdown next to it: pick the setting, click Save, and the change takes effect right away.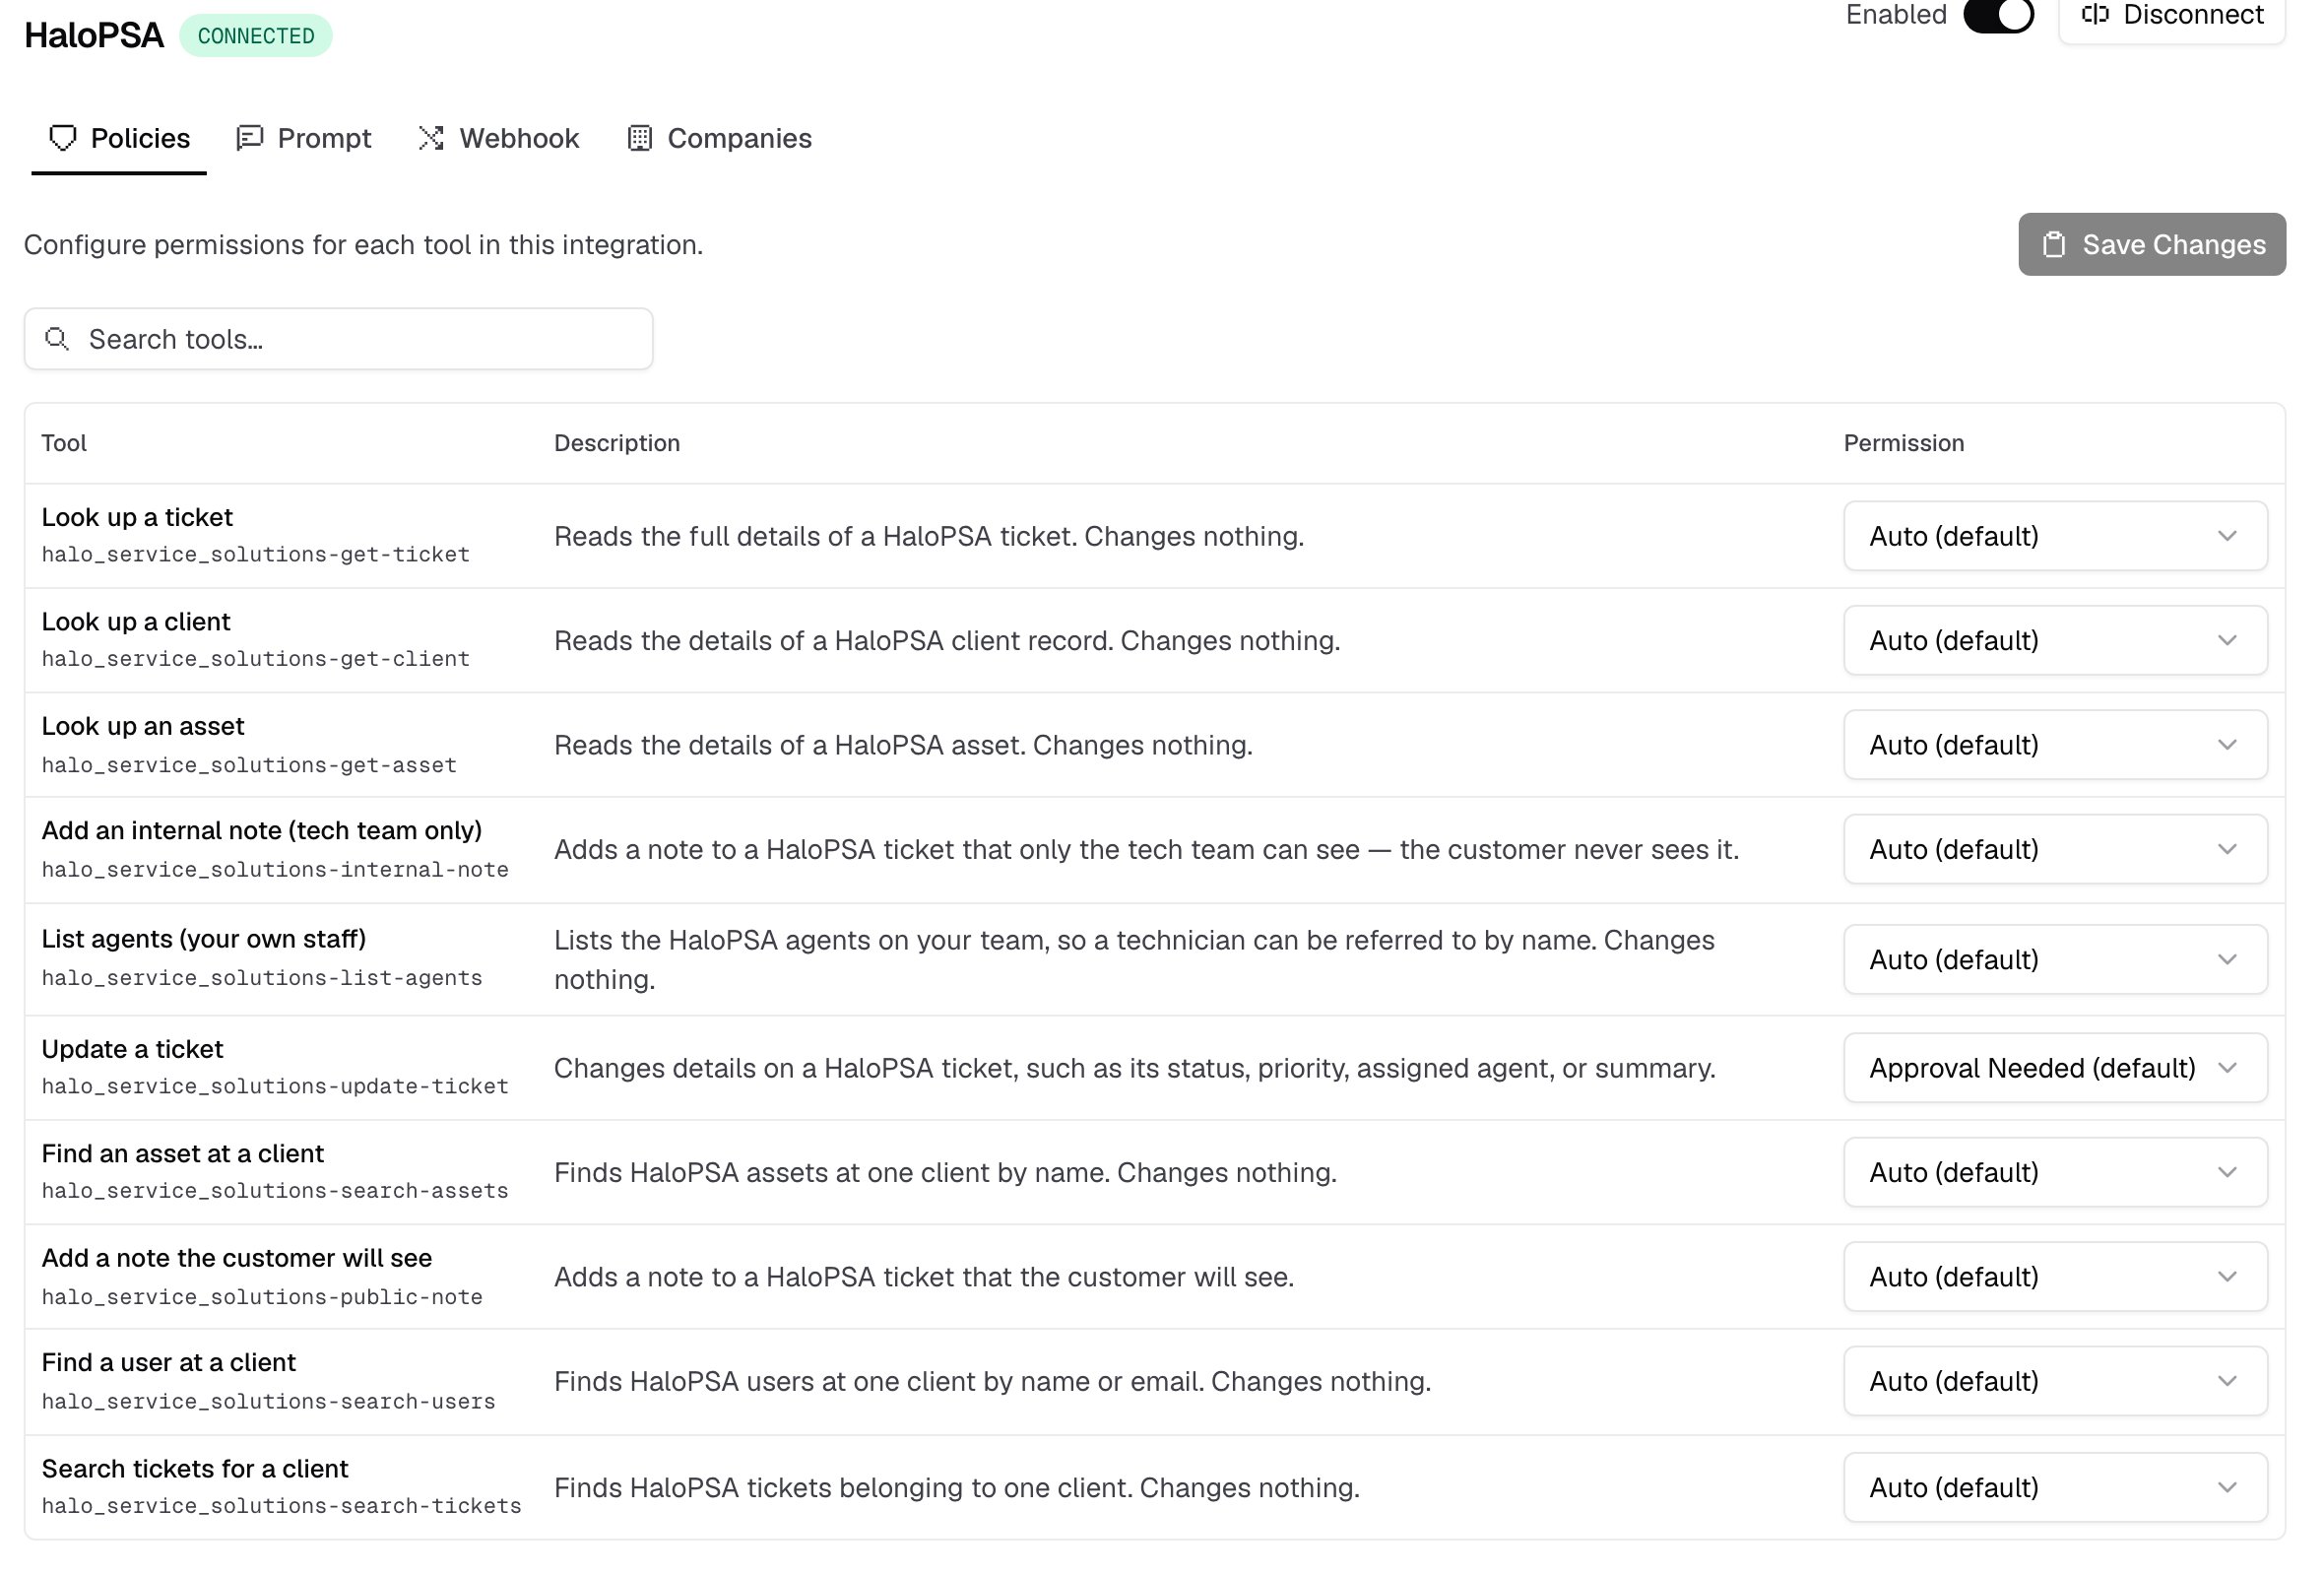
Requiring manager approval too
For anything set to Needs approval, you can add a second sign-off from the requester’s manager. When manager approval is enabled on an action:- Your technician gets the usual approval request.
- The requester’s manager gets one as well.
- Both have to approve before the agent proceeds.
Defaults when you connect a new integration
New integrations come pre-set with sensible defaults so you can turn them on without having to configure every action first:
These are starting points. Review them against how your team actually wants the agent to behave for each client.
Related
- Execute Mode — how approvals play out once a client is live.
- Rallied API — approval settings also govern what the agent can do from an API conversation.
- Identity Verification — the MFA check that runs before sensitive actions.
- Integrations — where each integration’s per-action settings live.